
we do. that’s who.
it should be noted that we are constantly amazed at how time seems to disappear once a small human enters your life . . .well, perhaps not completely surprised, given that we are ever-so-quick to drop everything just to tend to our cute and lovable bundle of small human – anyone interested in a quick game with thomas the train?
despite the fact that we claim we have no time, we have found periodic episodes (nap times) to do a few home improvements, just not actually showcase them. so here is my attempt to bring the world (and ourselves) back up to speed on our progress.
so this first project we are talking about is also very small human centered. over the past three years we have been watching many, many items no longer be in our control: time, money, energies, food, and now colorful, play objects that seem to keep on appearing out of nowhere.
in attempts to reclaim some of our identities (don’t get me wrong, i can build a mean train track for thomas and find myself loving it), and blend the kiddie toys in our main entertainment area, my husband and i have been seeking smart (and stylish) storage solutions.
keep in mind, our home is 13-ft wide, and essentially comes without closets of any sort. baskets have been employed, bins with handles, purging, you name it, we have tried everything to make the plastic, brightly-colored, noise-making toys “blend” with our style . . . and by “blend”, we mean hide.
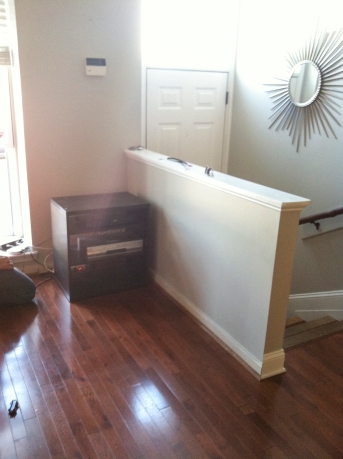 so as we began looking further at long-term solutions, because we think the human will stick around for a little while (at least we hope – though we hear the teenage years can be “challenging”), we started taking a hard look at our front entrance where a half-wall existed. Its a wall with essentially no purpose other than to act as a railing and hold the electrical outlet for interior and exterior lighting.
we began to think a nice built-in shelf with doors might be the answer here. we already had wired our television so that the cords went behind walls and under the floor back when we installed it (see old post here).
so my hubby and i looked into several different solutions and we ended up going to ikea and getting the upper kitchen cabinets with glass doors as the starter and then framing it in to have the built-in look we wanted.
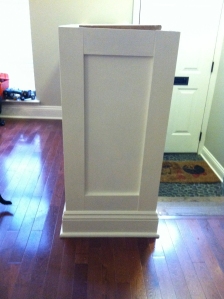
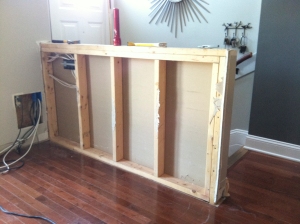 so first things first . . . a little destruction and pulling down old drywall (see right). we then had to move the massive amount of cords coming out of the front wall of the house (see far left in photo) so that they would enter the cabinet from the back, in the middle.
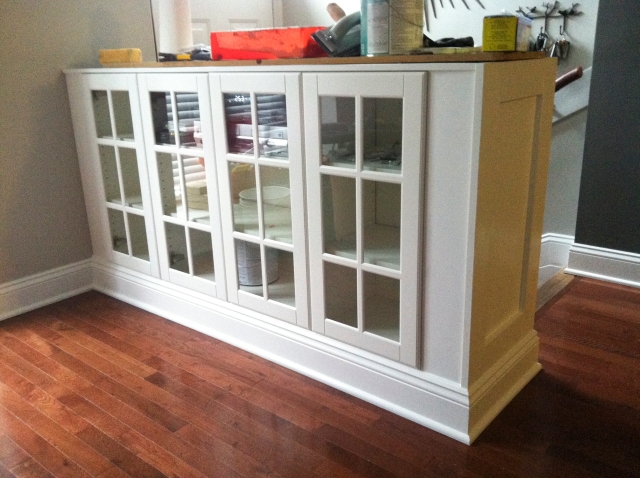
once those few things were completed, we were able to put together the ikea cabinetry – which, honestly, came fairly easy given that these were only 3 cabinets, and not the 60+ boxes we had to organize, build and place from our kitchen renovation (see old post here).

my husband then took measurements to create a platform for the shelves to sit on, to help raise the entire shelf unit, and also ensure that our molding would be able to fit under the doors. we wanted to ensure this detail, so that there wasn’t an extreme visual break when looking at the floor.
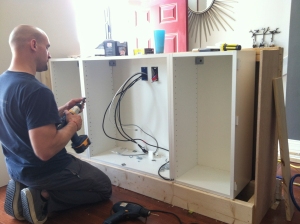
he then installed the backer to the cabinets and pulled wire through the wall to make sure that everything worked before starting to close in the edges of the cabinetry with wood, spacers, glue, nails, etc.
then began the process of measuring, cutting, measuring again, cutting, nailing, filling, sanding, drying . . . all to make this set of cabinetry look like it was custom made to the area (which, in reality, they kind of are).
as my husband cut and fitted the surround wood, he made sure to include a clean endcap feature that managed to tie in some of the classic and modern lines we have going throughout the house. we saw this style in one of our friends homes, and loved it so much we thought it would look nice in our home too (check out their born again kitchen here).
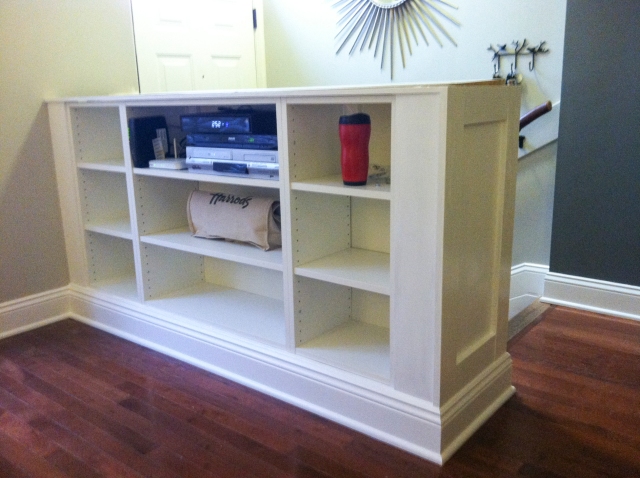
from there i was able to come in and install the doors (my husband likes to give me the “serious” tasks), like a champ. and the cabinetry was near complete. the only thing left was trying to figure out what kind of topper we wanted.
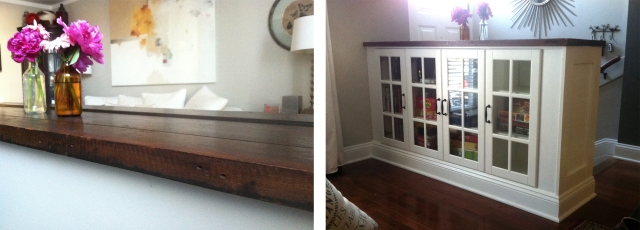
we debated stone, as we have half a slab of our kitchen countertops still in storage (awaiting a wet bar that we intend to instal one of these days . . .), but decided that texture-wise it might look a little out of place. We also debated just a plain piece of wood painted white, which is what was there before, but that had inherent problems in that it always seemed to look dirty (despite my incessant and mildly obsessive cleaning of it). finally my husband suggested that perhaps we call the same company that provided us with some amazing seating for our kitchen (details here) about what kind of reclaimed wood they might have available.
we went for a visit one saturday, and sure enough, they had a backer of one of the church pews – the same ones that we had purchased from over a year ago. and, as if the look couldn’t be better, the size was perfect and would require very little altering to fit to the dimensions of the surface.
lucky us.
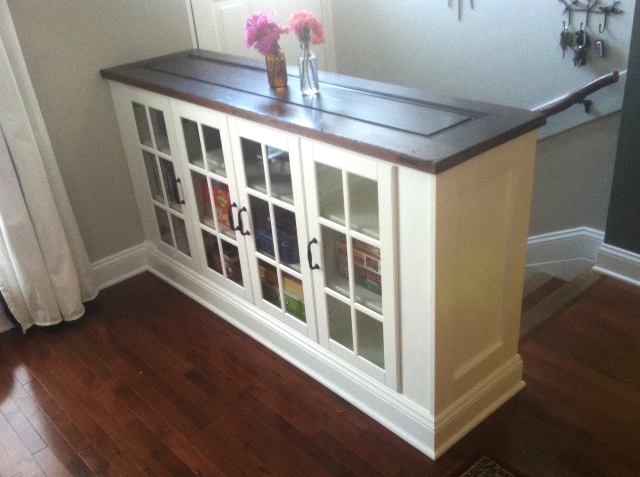
so we installed it on the top of the cabinets, smoothed out the edges, and then finally added handles to the doors. resulting in a fantastic, built in cabinetry that we absolutely love and can’t believe we waited until post-kid to tackle this project.
 (before and after)


Looks amazing!!! Great use of space! and thank you for the plug!!! xoxoxoxox M